MS Word Design Tab
MS Word Design Tab: Complete Guide (10-Min Read)
The Design tab sits right after Insert in Word's ribbon. It's the smallest tab in terms of tool count, but it has an outsized impact — instead of formatting one word or paragraph at a time, Design changes the look of your entire document in a single click.
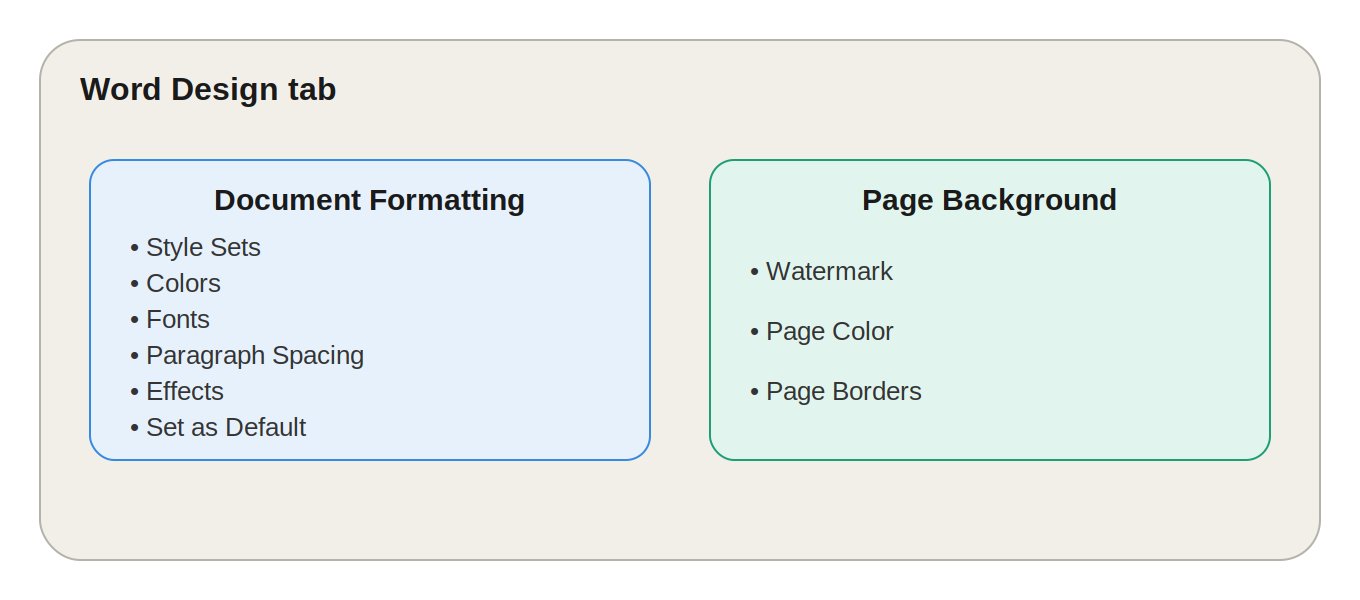
This guide covers every tool in both of its groups — Document Formatting and Page Background — plus practical tips on when and why to use each one.
Why the Design Tab Is Different
Every other tab you've likely used so far — Home, Insert — works on selected content. Bold a word, insert a table, add a picture. The Design tab works differently: it applies changes globally, across every page, heading, and paragraph at once.
Think of it as the difference between painting one wall versus repainting the whole house with a single click. That's the power (and the risk) of this tab — one click can dramatically change how your entire document looks.
1. Document Formatting Group
This group controls the coordinated visual theme of your whole document.
Style Set Gallery
At the far left, you'll see a row of small preview thumbnails — names like Basic (Simple), Elegant, Lines (Simple), Shaded, Minimalist, and more. Each thumbnail is a complete formatting package: it defines how Heading 1 looks, how Heading 2 looks, how body text is spaced, what font is used for titles, and how much space sits between paragraphs.
Click any thumbnail, and every heading and paragraph in your document — provided you've been using Word's built-in Heading styles — instantly updates to match. This is the fastest way to make a document look professionally designed without manually adjusting fonts, sizes, and spacing yourself.
Practical tip: Style Sets only work well if you've applied Heading 1, Heading 2, etc. from the Styles group (on the Home tab) instead of just manually bolding and enlarging text. If you skipped that step, Style Sets won't have much to restyle.
Colors
This dropdown controls the color palette tied to your document's theme — the colors used for headings, hyperlinks, accents, table shading, and SmartArt. Word offers built-in palettes like Blue Green, Grayscale, Marquee, Median, and more, or you can build a Customize Colors palette to match specific brand colors (using exact RGB or hex values).
This is especially useful for businesses that need documents to consistently reflect brand colors across reports, proposals, and templates.
Fonts
Similar to Colors, but for typography. Word's built-in themes pair two fonts — one for headings, one for body text. The Fonts dropdown lets you swap this pairing instantly (for example, switching from a Calibri/Calibri combo to a more editorial Georgia heading with Arial body text) across the entire document at once, again assuming you're using Heading styles.
You can also click Customize Fonts at the bottom of the dropdown to build and save your own heading/body font pairing.
Paragraph Spacing
This dropdown offers preset spacing rules: Compact, Tight, Open, Relaxed, and Double. Instead of manually adjusting line spacing paragraph by paragraph, this applies a consistent spacing rhythm across the whole document in one click — useful for quickly making a dense document feel more readable, or condensing a loose one to fit fewer pages.
Effects
This controls the visual effects applied to objects like shapes, SmartArt graphics, and charts — think subtle shadows, bevels, or flat styles. It doesn't affect plain text; it affects how graphical elements render.
Set as Default
Once you've dialed in a Style Set, Colors, Fonts, and Effects combination you like, click Set as Default. This saves your current combination as the starting template for every new blank document you create afterward — extremely useful if your organization has a house style you want baked in permanently, so you don't have to reapply it every time you open a new file.
2. Page Background Group
This group handles elements that live behind or around your main content, rather than the content itself.
Watermark
Adds faint text or an image behind your document's content — visible but non-intrusive. Word ships with built-in options like "DRAFT," "CONFIDENTIAL," and "DO NOT COPY" in various styles. You can also create a Custom Watermark:
- Text watermark – type your own text, choose the font, size, color, and layout (diagonal or horizontal)
- Picture watermark – insert a logo or image, with an option to "washout" it so it stays faint and doesn't interfere with readability
This is commonly used for draft reports, confidential business documents, or branding a document with a faded company logo.
Page Color
Changes the background color of the page itself. Note: this is primarily meant for on-screen reading — most home and office printers ignore background page color by default (to save ink), so don't rely on this for printed materials unless you specifically enable background printing in print settings.
Page Borders
Adds a border around the edge of every page — useful for certificates, formal documents, or decorative flyers. The Borders and Shading dialog lets you control:
- Setting – Box, Shadow, 3-D, or Custom
- Style, color, and width of the line
- Art – decorative pre-made border graphics (seasonal icons, classic patterns)
- Apply to – Whole document, this section only, or just the first page (handy for a fancy border only on a certificate's title page while keeping the rest plain)
Real-World Use Cases
Here's when the Design tab actually earns its place in your workflow:
- Business reports – Apply a Style Set + brand Colors + Fonts combination, then Set as Default so every future report matches your company's look automatically.
- Academic papers – Use Paragraph Spacing (Double) to meet formatting requirements instantly instead of manually adjusting line spacing.
- Confidential documents – Add a "Confidential" or "Draft" Watermark before circulating a document for internal review.
- Certificates and formal documents – Use Page Borders with an Art style to create a polished, framed look without needing design software.
- Consistent templates – Nail down your ideal Design tab settings once, then Set as Default so every blank document you open already matches your house style.
Design Tab vs. Home Tab vs. Insert Tab — Quick Comparison
| Tab | What it controls | Scope |
|---|---|---|
| Home | Text formatting (bold, font, alignment, lists) | Selected text/paragraph |
| Insert | Adding new elements (tables, images, links, headers) | Wherever the cursor is placed |
| Design | Overall document theme (colors, fonts, spacing, backgrounds) | Entire document at once |
💬 Leave a Comment & Rating